
A few years ago I started silversmithing and it has become such a joy. I got inspiration from my son who had spent a summer at a workshop in Indonesia. He came home with the most amazing jewellary in silver filigree. Since that, I have gradually made a workshop of my own at home. The equipment is quite expensive so it has taken quite some time. And you never get enough tools, you always want more. There is also more to learn and that never stops. Youtube is an excellent source of knowledge and apart from that, I have spent a couple of weeks in a workshop in Cornwall in England, and a short course in filigree in Lisbon in Portugal, and a summer course in Sweden. But most important, your practice and your own mistakes are what make things go forward. And there are many mistakes it’s unavoidable!
My work bench when I started.

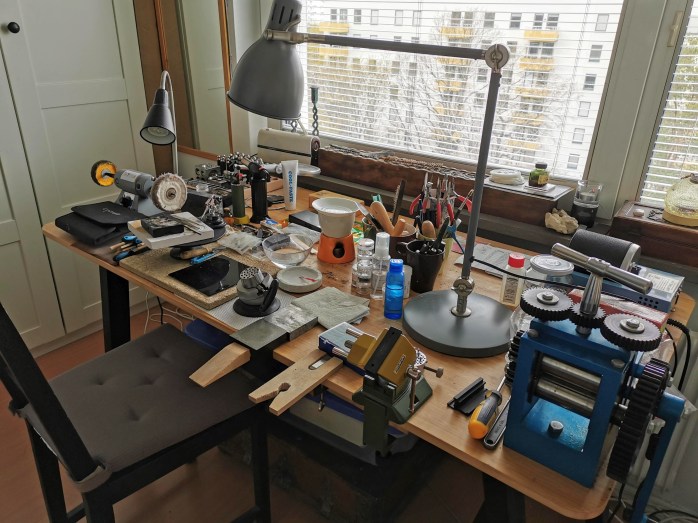
The workshop a few years later…
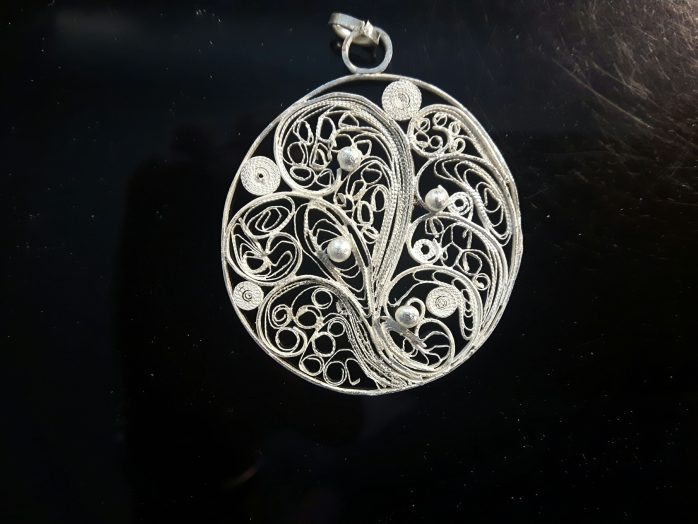
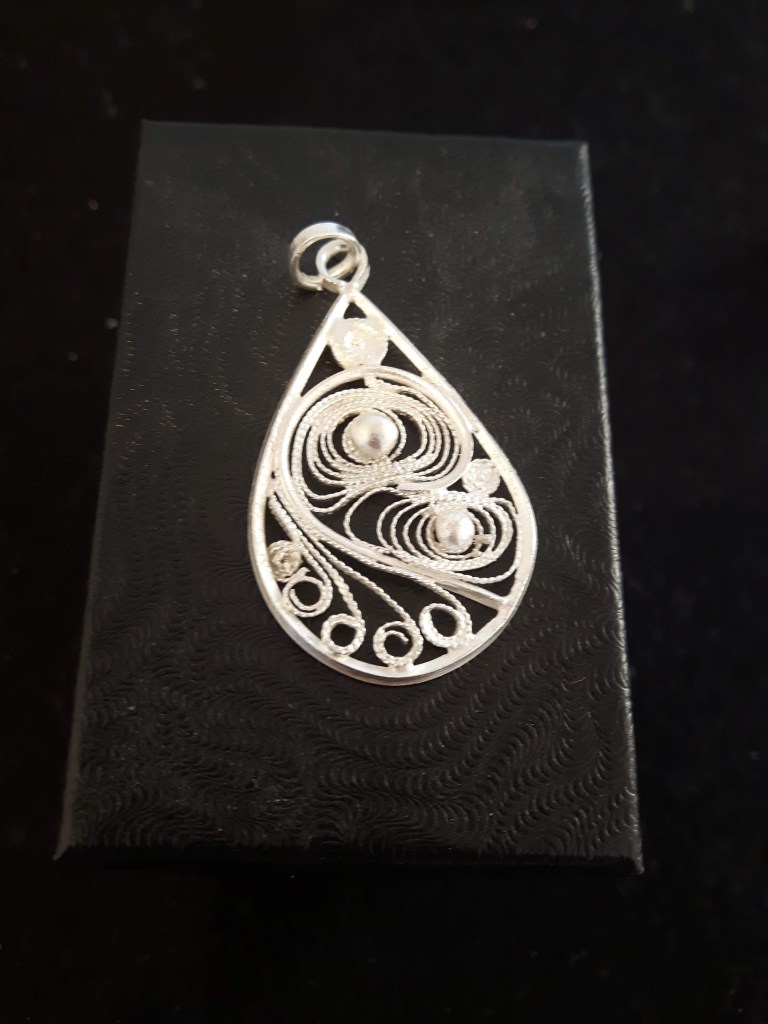
Successively I have learned to work in various styles. One of the first was, strangely enough, filigree which is one of the more difficult. It is an old technique where you form figures of twisted and milled thin wires and solder them in a thicker frame wire. The result is beautiful and delicate, but sometimes I am so focused on the tricky task that I forget to breath!

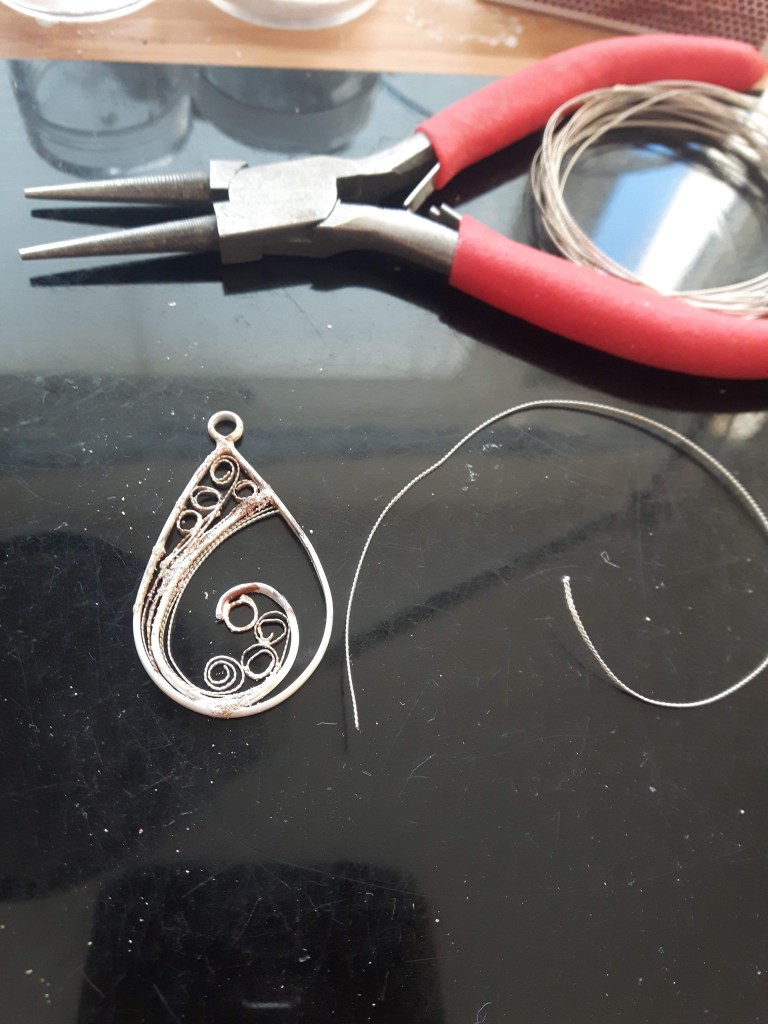
I made this pendant to the left at my course in Portugal, I completed it at home. The tricky moments are when the wires accidentally pop out from the frame wire and end up on the floor, never to be found! Or when you heat the wires too much when soldering and the whole piece melts and it is ruined. But sometimes I manage to complete it.
.

Very soon when I started making silver jewellery I realized that there would be an increasing amount of scrap silver, and you have to do something about it. The easiest thing to do is to melt small pieces to become spheres or grains. This is a natural process common to all kind of metals. Like magic the first time you see it! The grains are nice to solder on to decorate rings, pendants and other pieces of jewellery.
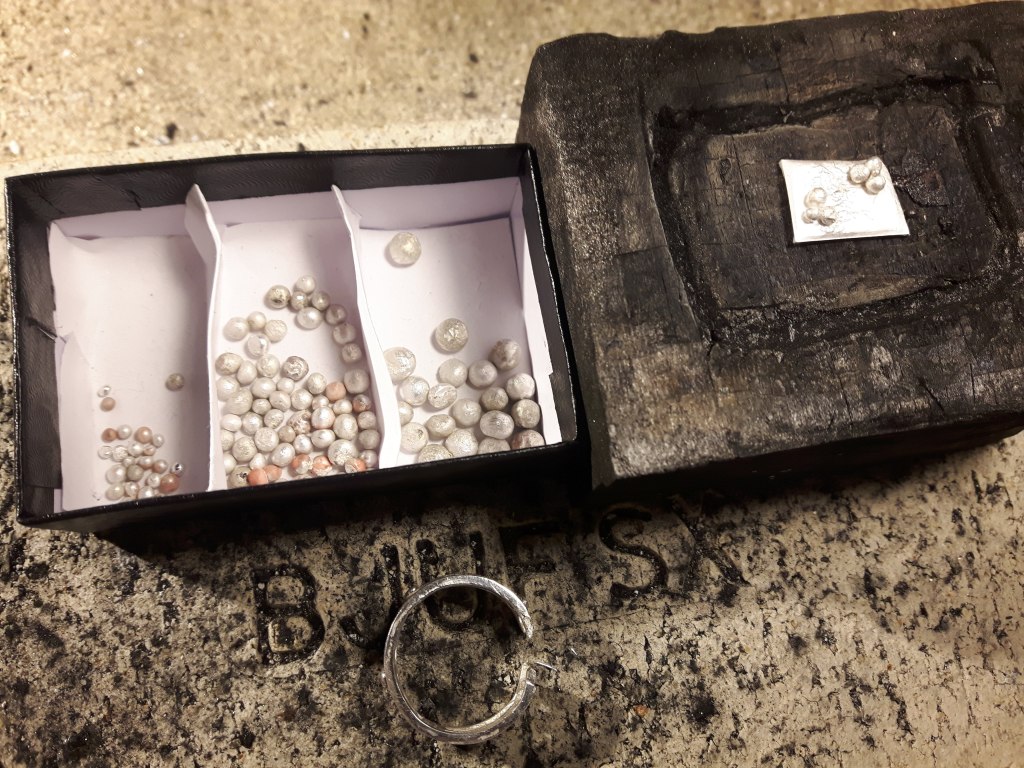


Later on, I bought a rolling mill which enabled me to melt down larger pieces and roll them into plates, ready for new usage. My rolling mill is to the far right in the photo above. It is quite a big investment and this is a simple and cheap rolling mill, but good enough for its purpose.
One of the most amiable aspects of jewellery making is using gemstones. There are endless possibilities with amazing gemstones, many not very expensive. Setting gemstones is a specialty of it’s own, and the two types I have acquired quite well is cabochon and claw setting.


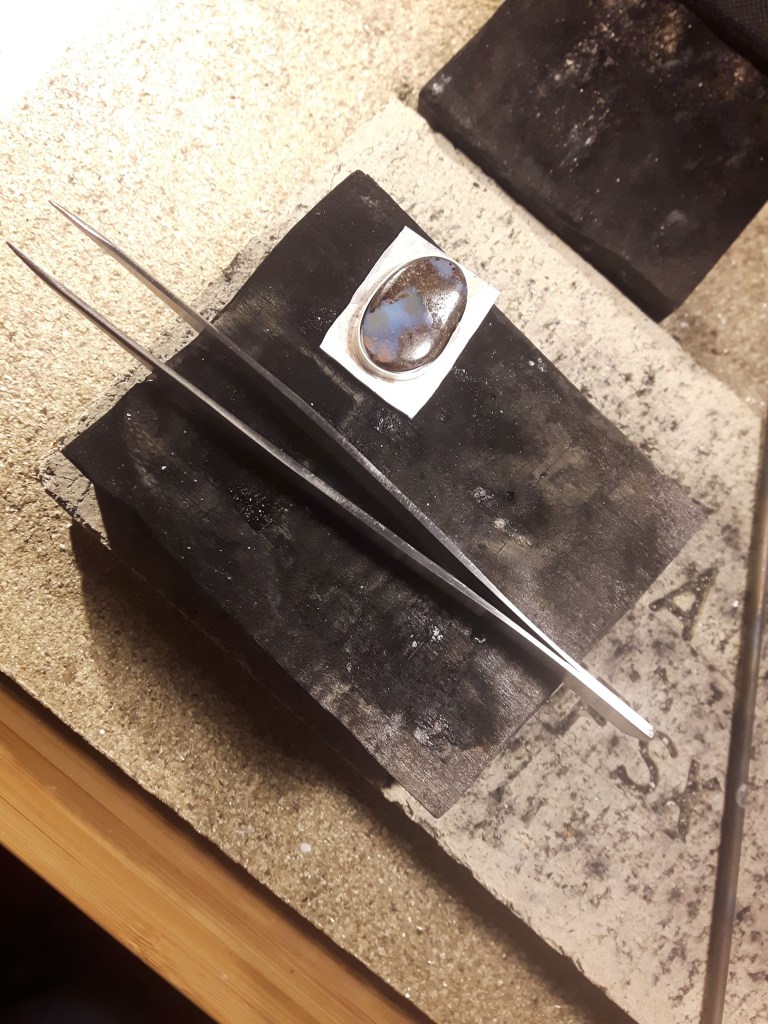
From left: a cabochon ready for setting, next set with Swedish blue slag, an unusual stone that I have written a blog post about. Next, you see the process of cabochon making, a bezel strip is soldered to a plate. Here the fitting of the stone checked, then you file down the plate to the preferred shape, polish and finally set the stone. This is a boulder opal.
Claw setting is not very difficult and a good choice if the stone is uneven or you want it to show transparent.


Other favourite stones, just a selection there are so many!

Chrysocolla 
Lapis lazuli 
Chrysokolla 
Kyanite 
Labradorite 
Turquoise, chrysokolla, amber, carnelian 
Labradorite
A big issue is polishing, very important for the final look. There are multiple methods but I find it difficult to get I good. The easiest and most time-saving is to have a tumbling drum. If you have small items with many details, for example filigree jewellery, this is the right choice.

My friend the tumbler 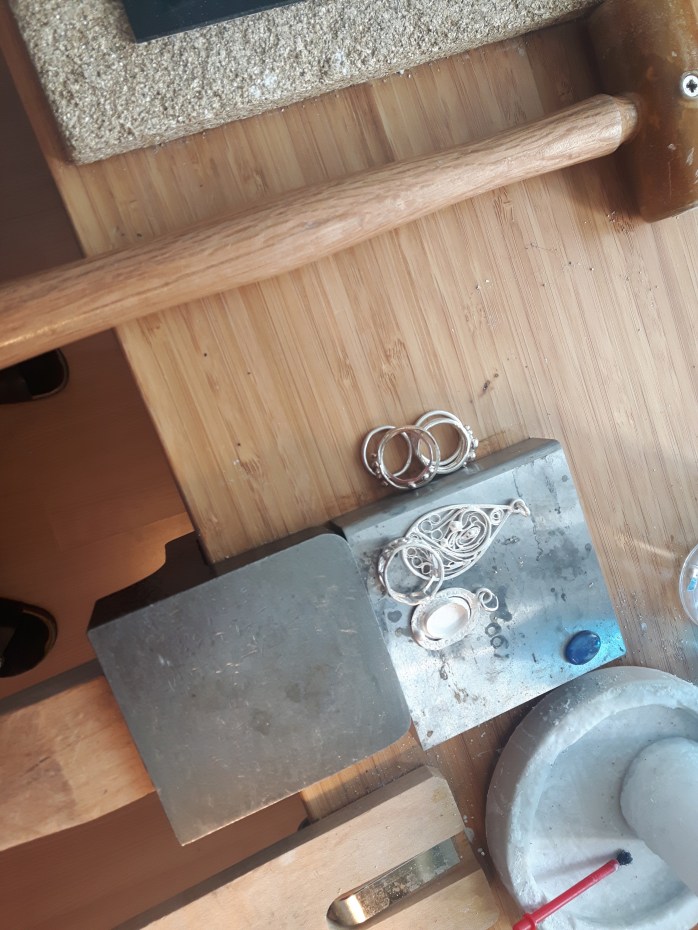
Ready for tumbling 
More ready for tumbling 
Tumbled silver with the stainless steel shot that does the job.
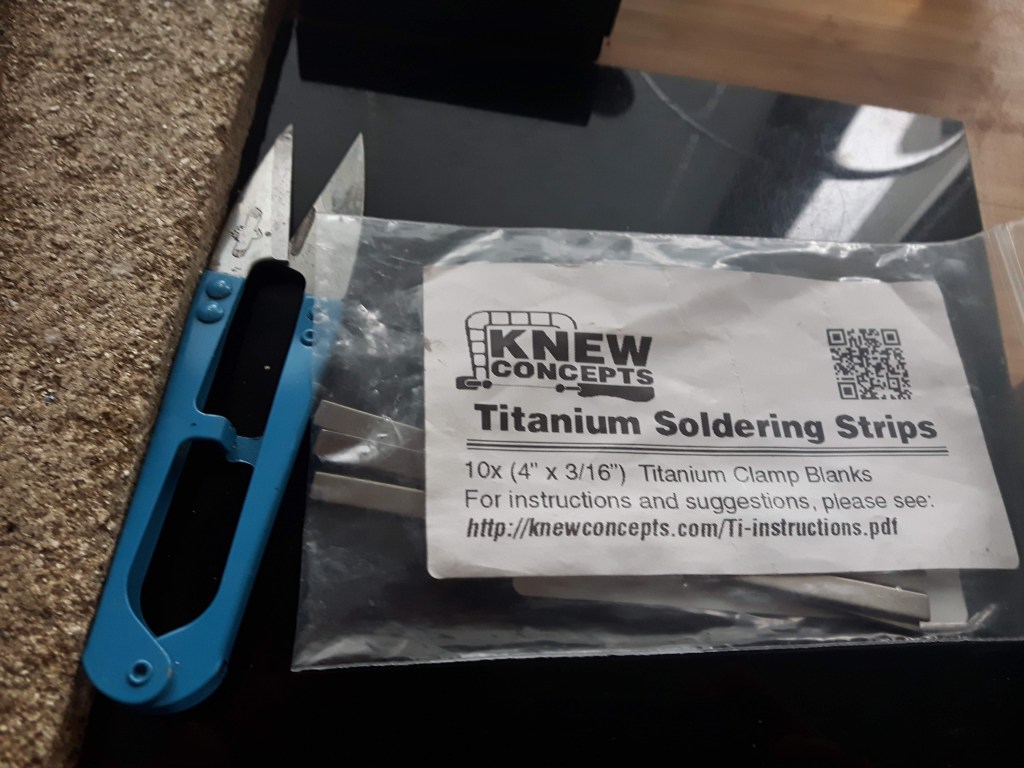
Some tools are better and more versatile than others. Those titanium strips help you to hold pieces together while soldering. They come as strips and you shape them as you like. Only your fantasy limits the usage.


Another thing that makes things much easier is this rotating plate for soldering. I prefer charcoal for soldering, it reflects the heat and reduces oxidation. Disadvantages are that coal is dirty and that the block cracks easily when heated.
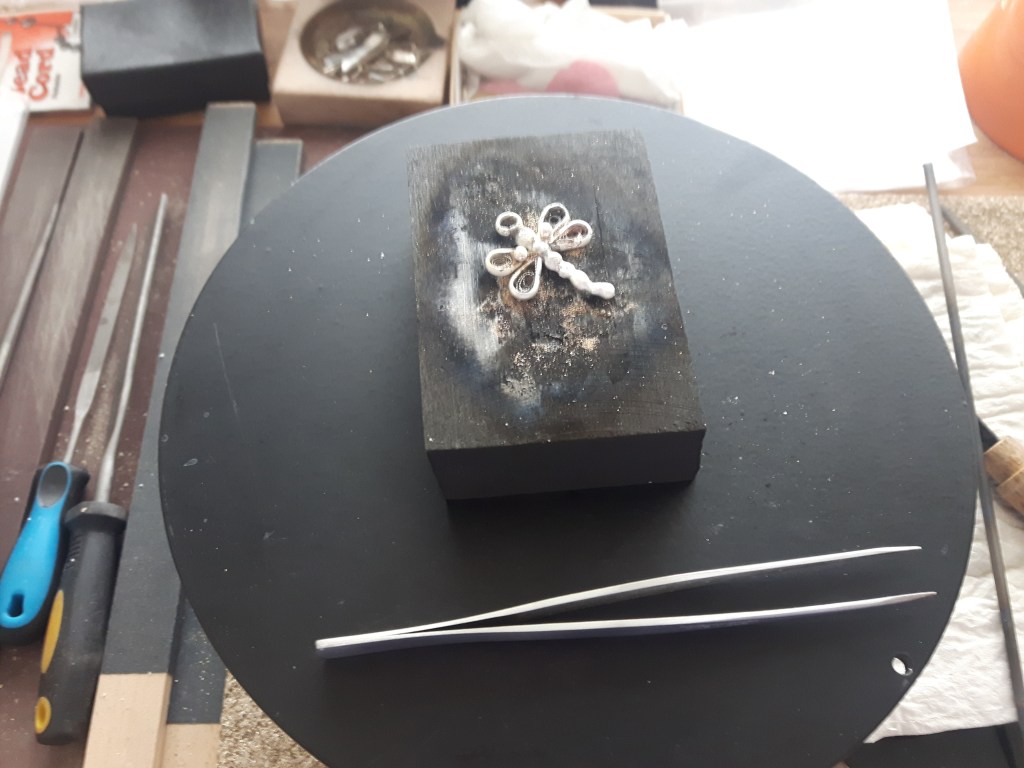
Rotating plate with a charcoal block with one of my favorite motifs, the dragon fly. 
Another favorite tool is this microblock vice from GRS. Makes setting stones and other tasks when you have to hold items and rotate seamlessly so much easier. It is expensive but definitely worth the money.


One thing that I find both amusing and challenging is making your own chains and findings. The thinnest chains you had better buy but it is not difficult to make more robust chains.
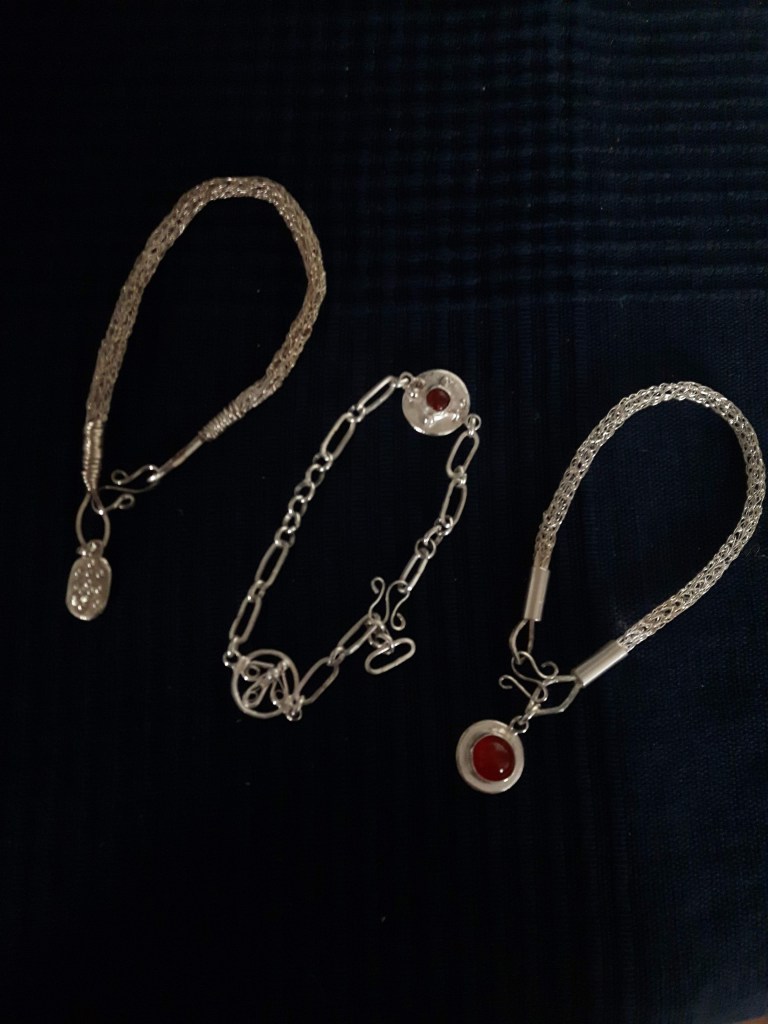
Bracelets with charms, one with chain links, two with knitted Viking chains. 
A bit more complicated fastening, a box catch. 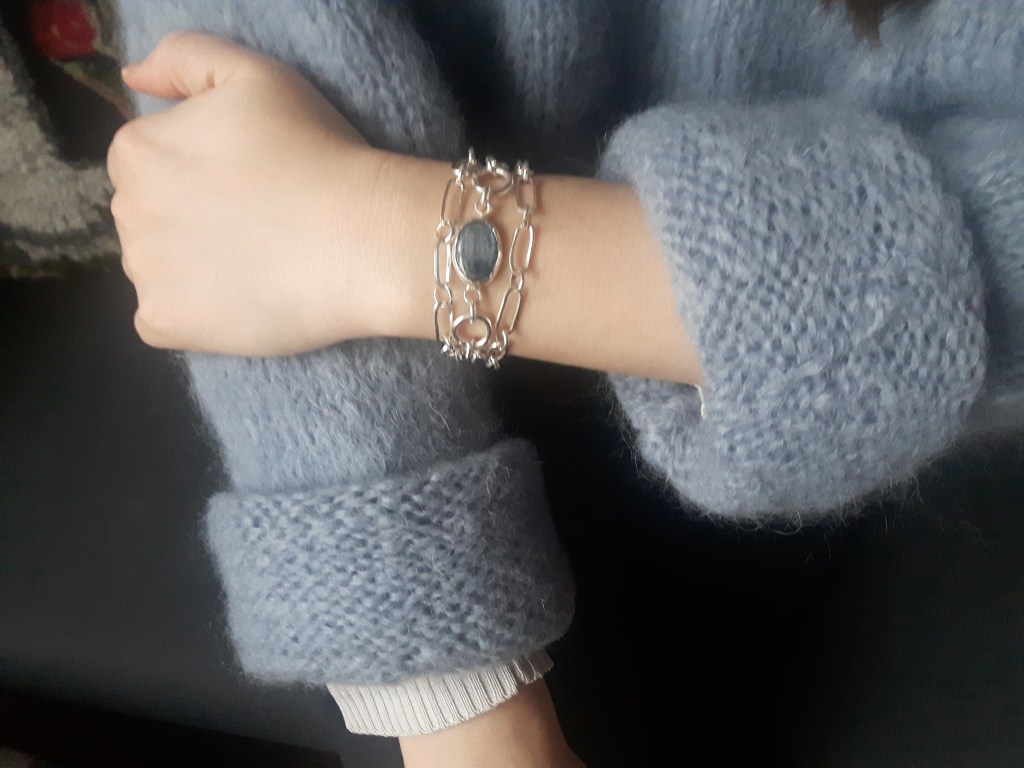
A simple chain that can be worn either as a bracelet or a necklace.The stone is kyanite. 
A simple chain with an s-shaped clasp, the simplest but effective. The stone is chrysocolla.


Leave a comment